

Easy Book Journaling (Includes FREE downloadable PDF!)
About half-way through the COVID lockdowns, I fell down the TikTok rabbit hole. As I interacted with the platform, it learned my preferences and it didn’t take long before my for you page was filled with video after video of beautifully laid-out bullet journals. Simple and stunning, these painstakingly created journals seemed like the perfect way to both document and celebrate my annual reading journey.
Enamored with the concept, I bought a notebook – along with an assortment of pens and markers I definitely didn’t need – and tried to draft out my own journal. What I quickly learned is that, while I desperately wanted a book journal, I simply hadn’t the patience nor the sobriety to measure all those little lines, train my hand to replicate the beautiful fonts, and imagine up creative spreads.
My solution was simple – create a pre-formatted journal that had the feel of a bullet journal without all the work.
After transitioning from a TikTok voyeur to TikTok creator and posting my own journal, I learned that lots of people apparently feel the same way I do about book journaling. Because us bookish-folks need to stick together, I wanted to share my journal process and practices (along with a free downloadable template). Hope this simplified journaling makes your heart as happy as it makes mine!
1. Gather Your Supplies
I didn’t have to venture away from my computer to hunt and gather my journal supplies – I just ordered them all from Amazon.

Reading Journal Binder
I selected an A5-sized linen from Amazon – because I’m fancy like that – but any A5-sized binder will work fine. I like this particular option because it has an elastic band that keeps it closed – and, of course, makes it look fancier.
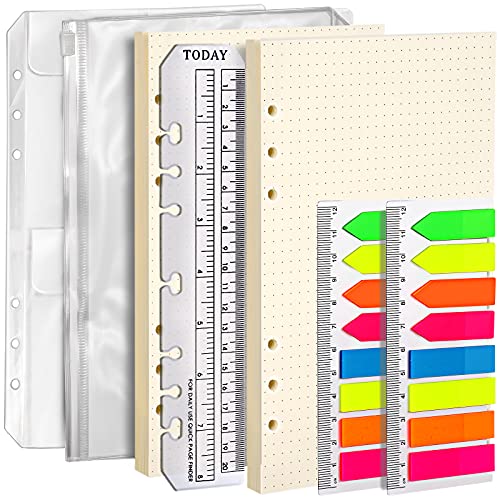
Notebook Organizers
I knew that if I didn’t keep all of my stuff together I would abandon this passion project pretty much immediately. To keep myself organized, I bought some notebook organizing tools. So far, I’m only using the zippered pouch and the removable bookmark-y thing – but I might use the other tools as I expand my journaling process. For now, these items will stay tucked away in the desk drawer I have dedicated to misfit stationary.
*Note - this set does come with some paper. I just bought more because I didn’t want to have to separate the pad pages. If you’re not as lazy as I am, this paper could work to get you started.

A5 Paper
You can find A5-sized paper blank, lined, or dotted. It also comes pre-punched or un-punched. My personal preference was for dotted, pre-punched paper, so that’s what I bought!
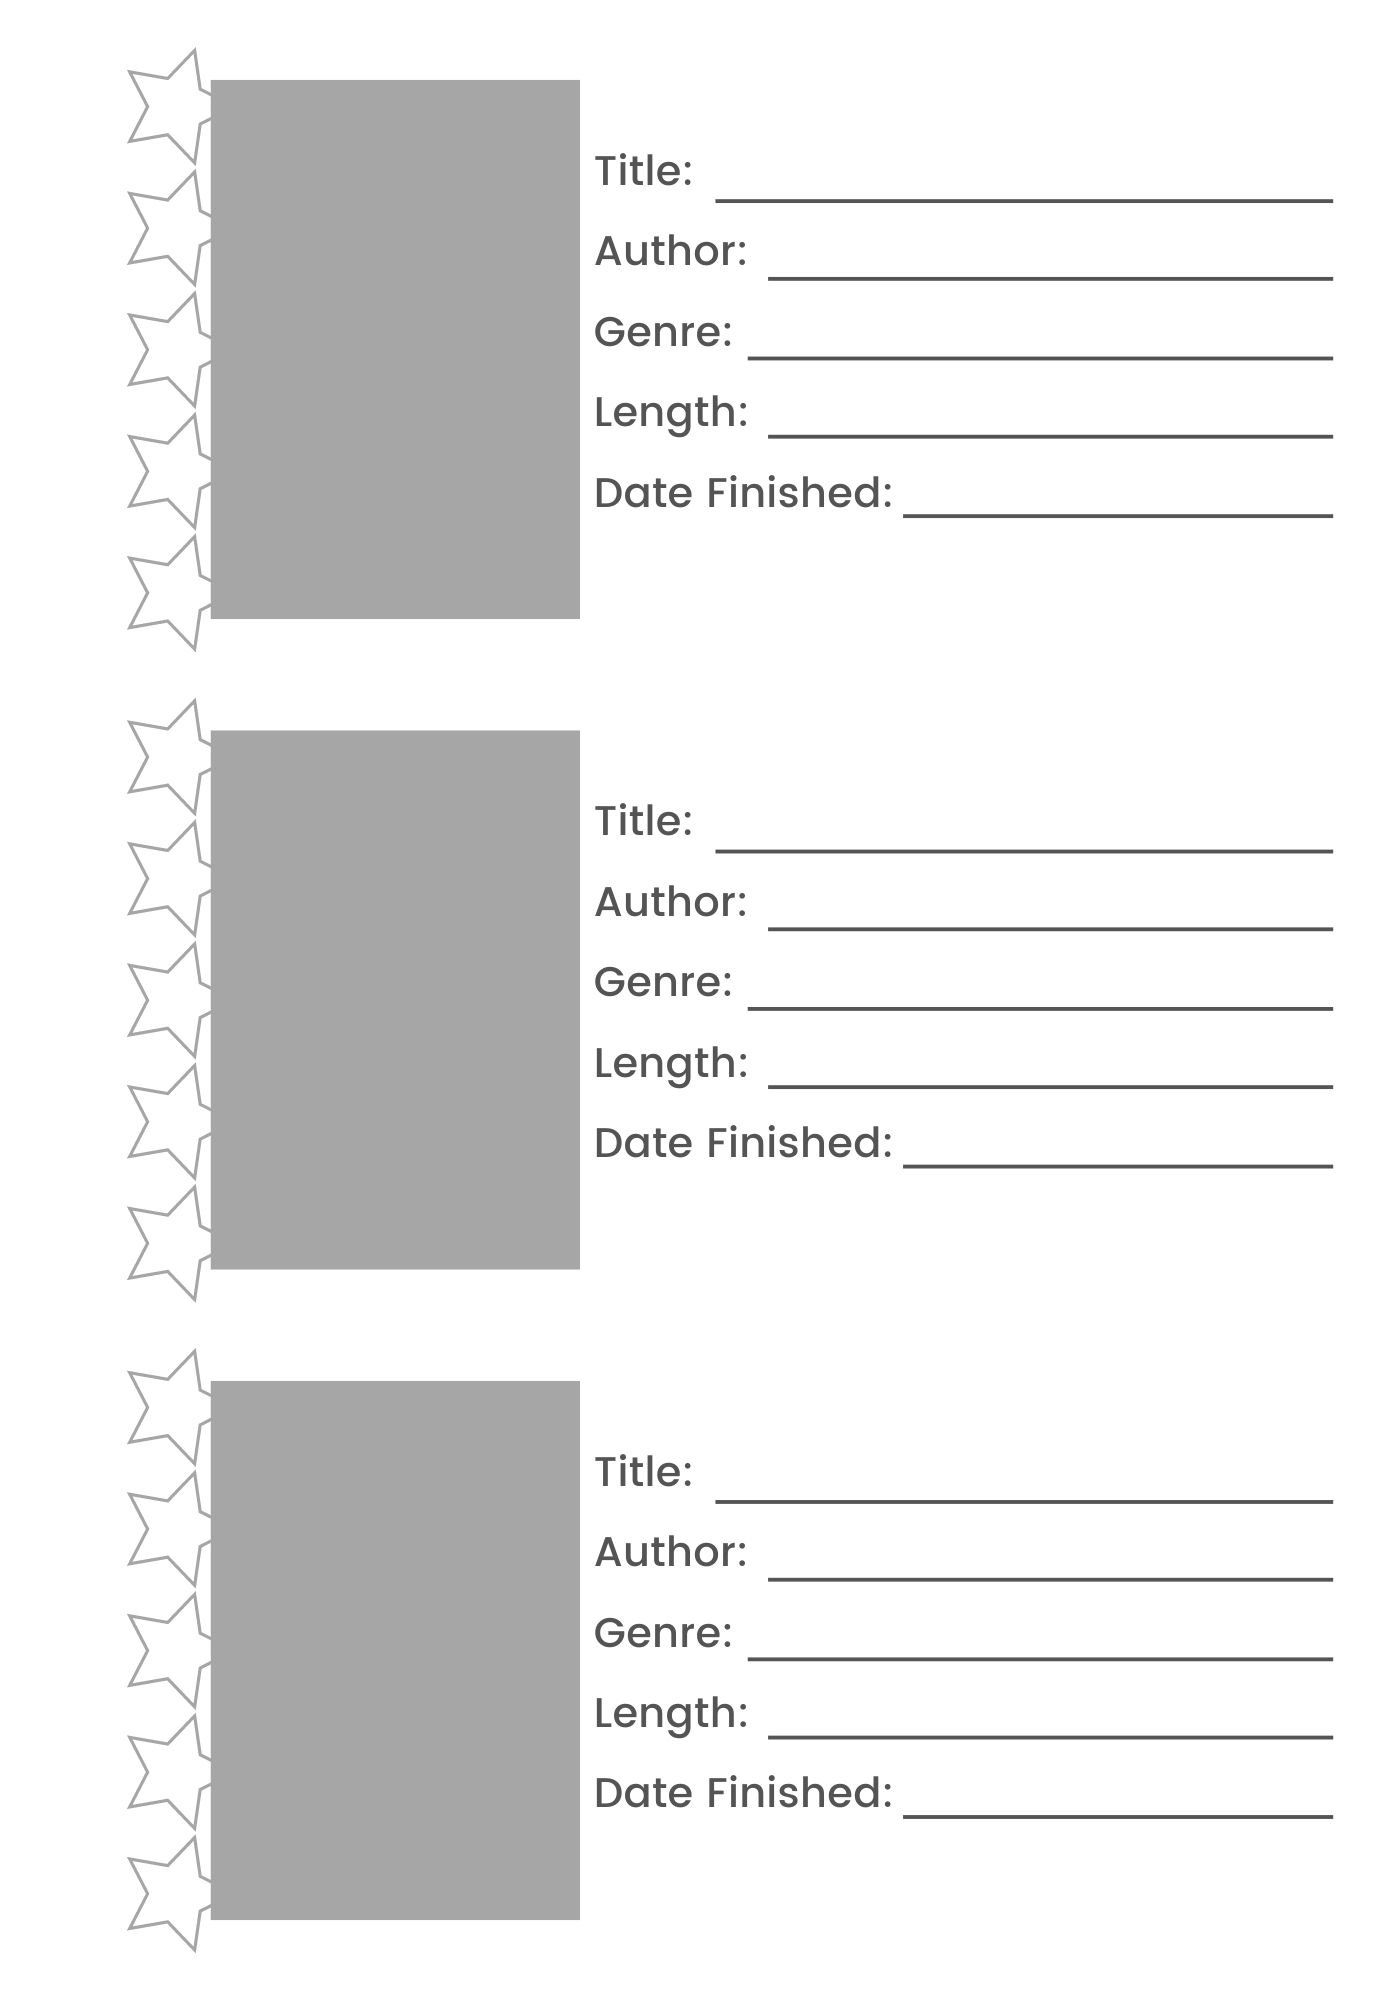
I initially bought a 200 sheet package, which proved to be way more than I need (overbuying is very on-brand for me, so it’s not a surprise). Each page of the template holds 3 books and I printed mine front-to-back, so this 100 page pack would get you to 600 books if you did the same.

Sticker Paper
My favorite part of the reading journaling process is adding the cover stickers. I like to print mine on full sheets of sticker paper – that way I don’t have to worry about using a sticker template or trying to find pre-cut labels that fit my template (because it’s a size I don’t think they produce commercially). If you want to save a bit of money, you could also print your cover images on regular paper and attach them with glue.

Star Stickers
When I first started book journaling, I simply colored in the stars to indicate my rating. Despite my best efforts, though, I could never get the stars quite as bold as I wanted them to be — which I know is a total non-issue, but it bothered me nonetheless.
After about a month of that, though, I modified my template and starting using star stickers. The stickers linked here fit perfectly onto my template – plus they are both cheap and come in a huge package, so you could journal for years without having to replenish.
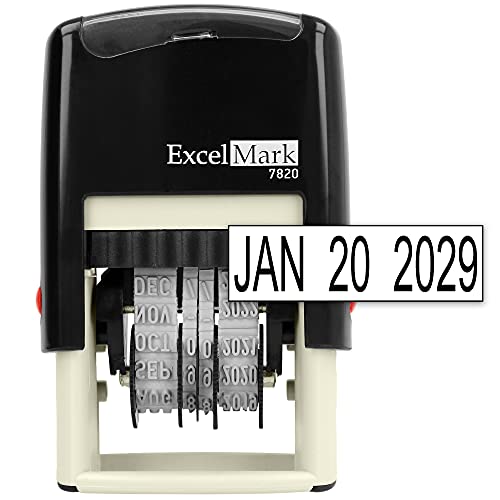
Date Stamp
“Why don’t you just write in the date,” my husband once asked me. He obviously doesn’t get it! In all seriousness, though, you totally could just write in the date. I just like to use a date stamp because it makes me feel like I’m a child who is playing librarian – which seems to be a feeling I like. I selected a self-inking stamp. If you prefer, you could purchase a traditional date stamp and ink pad instead.
2. Print Your Pages
After the delivery people made my day by delivering all of my supplies, I needed only to print my pages.
First, click here to download the template
After downloading the template, load your paper into your printer.
If you want to print 1-sided only, only use the first page of the template (as the margins are designed for this page to fit on a paper with holes punched on the left side). If you want to print front-and-back, you’ll use both pages 1 and 2.
In your printer dialog box, be sure to select “Actual size” under the Page Sizing & Handling section (if you don’t the dimensions won’t fit with your cover and star stickers).

Once you’ve done this, select the number of copies and print!
Your printer should automatically recognize your paper size - but if it requires you to enter the size or verify, select the size “A5”.
3. Print Your Stickers
By far, the most common question I have gotten regarding this book journal has been, “where do you get those book stickers?”
The answer: I print them!
To get your cover image, Google the title and author of the book for which you need a sticker and either click over to “images” on your Google search results:

Alternatively, you can locate the cover of your book on Amazon. Right click to either save the image or copy the image.
Upload your saved image, or paste your copied image, into a Google doc.
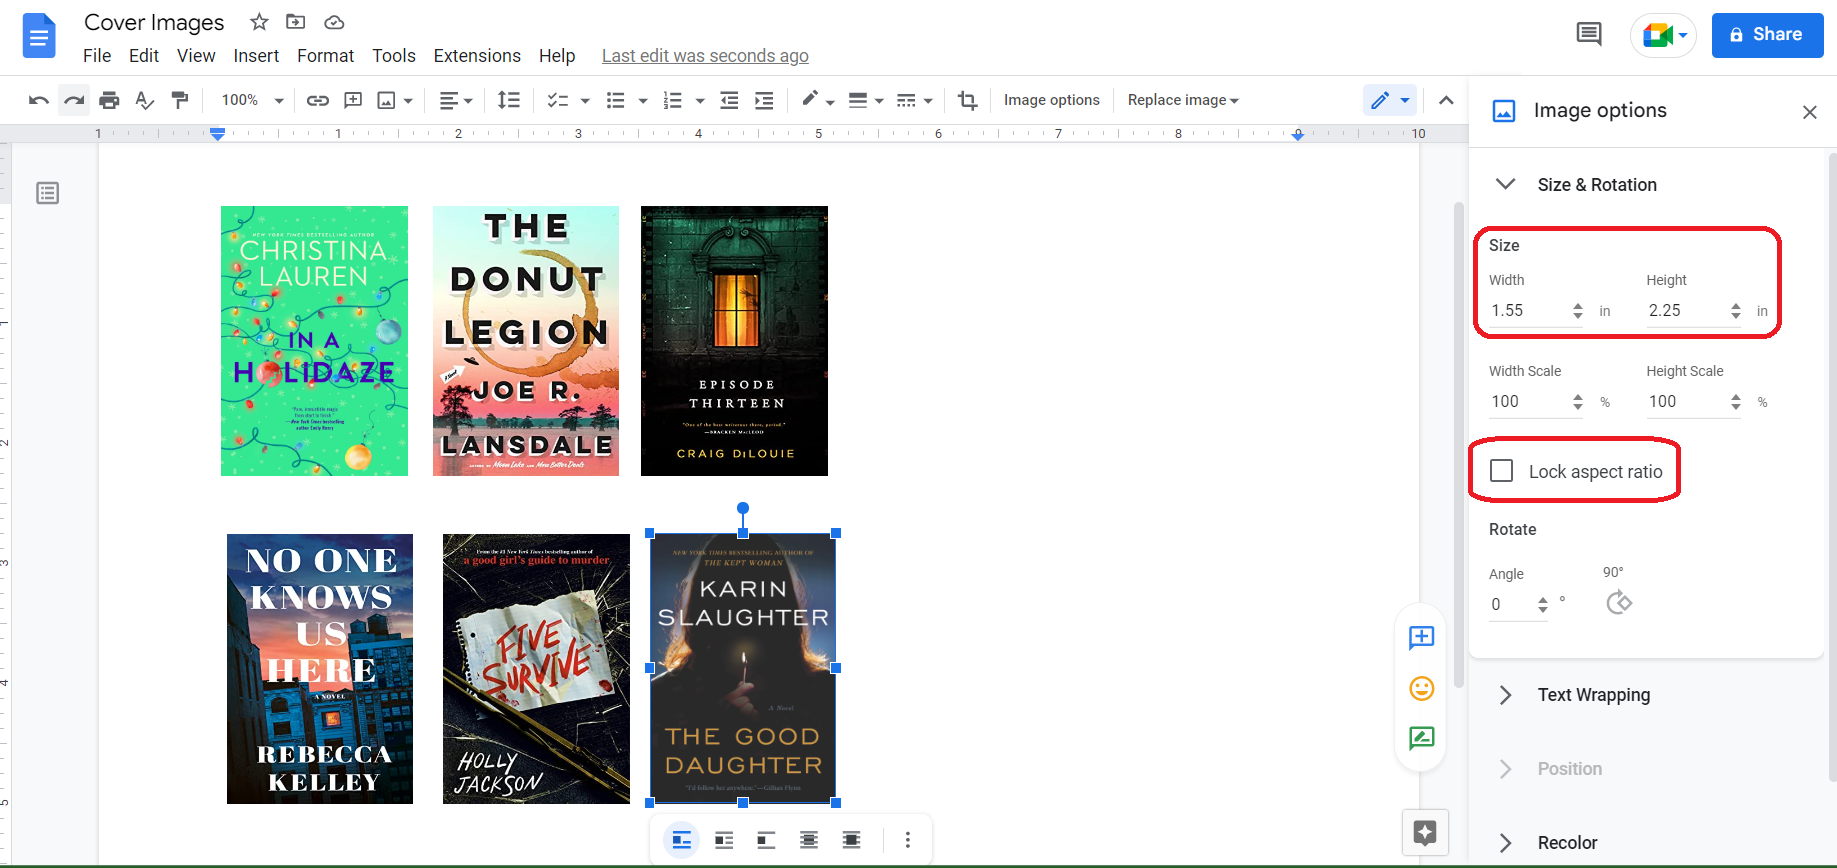
Select the image and click on “Image Options” in the toolbar at the top of the page:
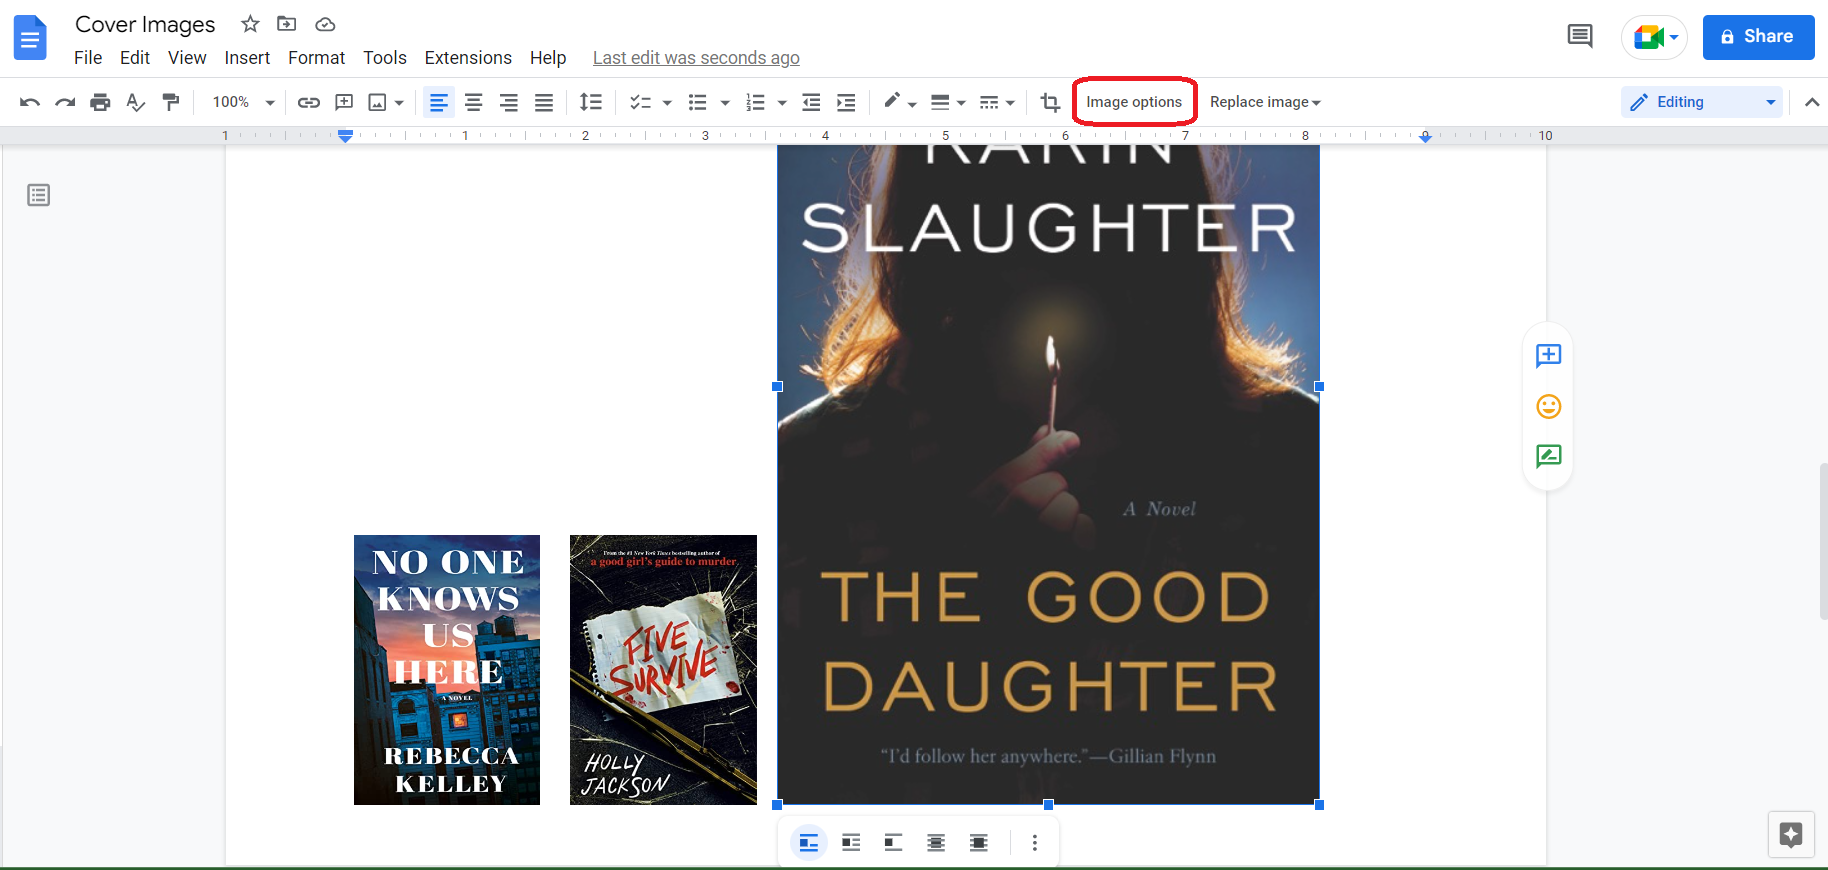
In the Image options sidebar, select “Size & Rotation”. Uncheck the box next to “Lock aspect ratio” and resize the image to a width of 1.55 inches and a height of 2.25 inches.
Because you are going to print out a whole sheet of stickers at a time, you’ll want to think about what books you plan to read next and make stickers for all of those books at one time - otherwise, you’ll be wasting quite a bit of sticker paper.
Once you’re satisfied with your stickers, print the whole sheet onto sticker paper.
Carefully cut around the stickers. I usually leave a little extra border on one side so I don’t mess up the sticker when trying to peal the back off - I clip this last little bit off right before I affix the sticker in my journal.
4. Start Journaling
That’s it - you’re ready to start journaling!


